

Linux VPS or Dedicated Server provides you with WHM to manage your website hosting accounts. WHM allows you to host multiple websites on different domains but that’s what cPanel may also do. So what is the difference?
The difference is that WHM allows you to set up separate cPanel accounts for websites and not only this but you can assign a package to limit the resource usage of websites hosted on your server.
Now if you only have one single website to host on your server and you want to use all your resources on that specific website then you simply set cPanel without assigning any package to it.
WHM stands for Web Host Manager. It is the main control panel for setting up a server and not the websites on the server, but the server itself. Setting up a website is the second step which you do after creating new cPanel accounts from the WHM of your server.
The Differences Between WHM & cPanel
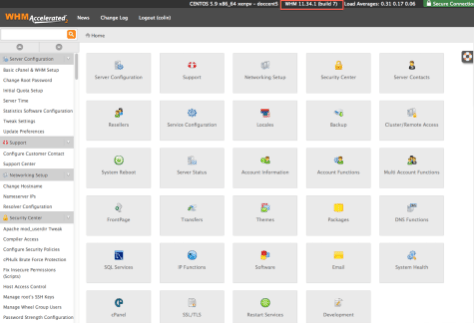
WebHost Manager, or WHM, provides administrative control of your dedicated or Virtual Private Server (VPS). You use WebHost Manager to create individual accounts, add domains to your server, manage hosting features, and perform basic system and control panel maintenance
The main features of WHM are:
- Server-Level Control Panel: WHM is designed for hosting providers and server administrators. It’s used to manage the server as a whole and to create and manage cPanel accounts for individual hosting clients.
- Server Management: WHM focuses on server-level tasks, such as server configuration, software installation, security settings, and resource allocation to individual cPanel accounts.
- Reseller Hosting: WHM allows for the creation of reseller hosting accounts. Resellers can use cPanel to create and manage their own hosting clients and accounts.
- Security: WHM offers server-level security settings and access controls for managing cPanel accounts, including the ability to enforce security policies for all hosted accounts.
- Resource Allocation: WHM lets administrators allocate resources like disk space, bandwidth, and other server resources to cPanel accounts.
- User Authentication: WHM is accessed by administrators using their own login credentials. It’s used to create and manage cPanel accounts, each with its own set of credentials.
- Typical Users: WHM is used by hosting providers, data center operators, and server administrators who manage multiple hosting clients or accounts.

The cPanel is designed for managing particular domains or hosting accounts on your server. End users can control everything from adding/removing email accounts to administering MySQL databases etc.
The main features of cPanel are:
- End-User Control Panel: cPanel is designed for end-users, typically website owners, and administrators who manage their hosting accounts. It provides an easy-to-use graphical interface for various website and account management tasks.
- Website Management: cPanel is primarily used to manage individual websites and their associated settings, such as creating and managing email accounts, databases, file management, and domain settings.
- User-Level Features: cPanel offers features like website backups, email management, website statistics, domain management, and one-click application installations (e.g., WordPress).
- Security: While cPanel provides security features, it focuses on the security of individual hosting accounts and websites.
- Resource Usage: cPanel allows users to monitor and manage their resource usage, including bandwidth and storage.
- User Authentication: Users log in to cPanel with their credentials.
- Typical Users: cPanel is used by website owners, bloggers, small business owners, and anyone with a web hosting account.
cPanel is the end-user control panel used by individuals and businesses to manage their website and hosting account, while WHM is the server-level control panel used by hosting providers and server administrators to manage server resources, create and manage hosting accounts, and enforce security and resource allocation policies for multiple cPanel users. The two often work in tandem, with WHM allowing administrators to create and manage cPanel accounts for their clients.


