When choosing between Plesk and cPanel, several factors should be considered, as both have distinct advantages and may be better suited to different users based on their specific needs. Here is a comparison to help you decide which one might be better for you:
1. User Interface
Plesk: Known for its modern, clean, and user-friendly interface. It’s considered more intuitive, especially for beginners.
cPanel: Has a more traditional interface that some users find cluttered. However, it is also highly functional and well-organized for those familiar with it.
2. Operating System Compatibility
Plesk: Supports both Linux and Windows operating systems, providing greater flexibility in server environment choices.
cPanel: Primarily supports Linux-based servers (CentOS, CloudLinux, RHEL, AlmaLinux, and Ubuntu), with no official support for Windows.
3. Features and Tools
Plesk:
Strong in web application management, with built-in support for Docker, Git, and Node.js.
Offers a variety of extensions and integrations, including a comprehensive WordPress Toolkit.
Provides robust security features like Fail2Ban, built-in firewall, and automatic SSL/TLS certificate management.
cPanel:
Highly popular in the hosting industry, making it easy to find hosting services and support.
Offers extensive features for domain, email, and database management.
Integrates with WHM (Web Host Manager) for powerful reseller and server management.
4. Security
Plesk: Offers integrated security tools such as Fail2Ban, ModSecurity, and Let’s Encrypt for SSL certificates. Security settings are easily managed through the interface.
cPanel: Also provides robust security features, including Imunify360, CSF (ConfigServer Security & Firewall), and auto-SSL for easy certificate management.
5. Customization and Extensibility
Plesk: Known for its wide range of extensions available through the Plesk Extension Catalog, allowing extensive customization.
cPanel: Supports a variety of plugins and has a strong community contributing to its ecosystem, providing numerous customization options.
6. Ease of Use
Plesk: Often preferred by beginners due to its straightforward and intuitive design.
cPanel: Favored by experienced users and web hosting professionals for its comprehensive and familiar interface.
7. Performance and Resource Management
Plesk: Offers detailed resource usage statistics and monitoring tools, making it easier to manage server resources effectively.
cPanel: Also provides excellent resource management and performance monitoring, with tools to track server load, disk space usage, and more.
8. Support and Community
Plesk: Provides comprehensive documentation, dedicated support, and a supportive community forum.
cPanel: Has extensive online documentation, a large user community, and strong support channels, making it easy to find help and resources.
9. Cost
Plesk: Generally considered slightly more expensive than cPanel, but the difference may be justified by the additional features and support for Windows servers.
cPanel: Typically less expensive, especially for small to medium-sized hosting setups on Linux servers.
Conclusion
Choose Plesk if you need a user-friendly interface, support for both Linux and Windows, robust security features, and extensive development tools.
Choose cPanel if you prefer a traditional interface, need a widely-supported Linux-based hosting solution, and require strong integration with WHM for reseller hosting and server management.
Ultimately, the choice between Plesk and cPanel depends on your specific requirements, familiarity with the platforms, and the hosting environment you intend to use. Both are powerful and reliable control panels with their own strengths.
How To Subscribe To A Plesk Or cPanel Web Hosting Platform?
A MySQL database is a relational database management system (RDBMS) that utilizes structured query language (SQL) to store, retrieve, and manage structured data.
MySQL databases consist of tables organized into rows and columns, with each table representing a specific data entity and each row representing a single record or entry. MySQL is widely used for web applications and websites, offering features such as data integrity, transaction support, scalability, and robust security mechanisms.
It is an open-source database system, making it accessible and customizable for a wide range of applications and industries. MySQL is known for its reliability, performance, and ease of use, making it a popular choice for developers and businesses seeking a powerful and cost-effective solution for managing their data.
Repairing a MySQL database involves several steps to identify and fix any issues that may be causing corruption or damage to the database. But to fix a database you need to access it. To access a MySQL database on cPanel, you typically follow these steps:
Log in to cPanel: Open your web browser and navigate to your cPanel login page. This is usually accessed by appending “/cpanel” to your domain name (e.g., yourdomain.com/cpanel). Enter your cPanel username and password to log in. If this doesn’t works, then alternatively you can access the cPanel from your hosting’s account page.
Locate the MySQL Databases Icon: Once logged in, you’ll see a variety of icons representing different features and functions available in cPanel. Look for the “MySQL Databases” or “Databases” icon, which is usually located under the “Databases” section.
Access MySQL Databases: Click on the “MySQL Databases” icon to access the MySQL Databases interface. This interface allows you to manage your MySQL databases, including creating new databases, adding users, and assigning privileges.
Locate Your Database: In the MySQL Databases interface, you’ll see a list of existing databases under the “Current Databases” section. Each database will have a name preceded by your cPanel username and an underscore (e.g., username_database1). Locate the database you want to access.
Access phpMyAdmin: To interact directly with your MySQL database, click on the “phpMyAdmin” icon, which is usually located next to the database name. phpMyAdmin is a web-based application that provides a graphical user interface for managing MySQL databases.
Log in to phpMyAdmin: After clicking on the phpMyAdmin icon, you’ll be directed to the phpMyAdmin login page. Enter the username and password for the MySQL database user associated with the database you want to access. This may be different from your cPanel login credentials.
Navigate Your Database: Once logged in to phpMyAdmin, you’ll see a list of databases on the left-hand side of the screen. Click on the name of the database you want to access to expand it and view its tables. You can then click on individual tables to view and manage their contents.
Perform Database Operations: From the phpMyAdmin interface, you can perform various database operations, such as running SQL queries, creating or modifying tables, importing or exporting data, and managing users and permissions.
Log Out and Close phpMyAdmin: After you’ve finished working with your database, be sure to log out of phpMyAdmin to secure your data. You can do this by clicking the “Log Out” button in the phpMyAdmin interface. Once logged out, you can close the phpMyAdmin window or tab.
By following these steps, you can easily access and manage your MySQL databases on cPanel using phpMyAdmin.
Here’s a general guide on how to repair a MySQL database:
Backup Your Database: Before making any changes to your database, it’s essential to create a backup to ensure that you can restore your data in case anything goes wrong during the repair process. You can use MySQL’s built-in tools or third-party backup solutions to create a backup of your database.
Identify Database Issues: Use MySQL’s diagnostic tools to identify any issues or errors in your database. You can check the MySQL error log, run diagnostic queries, or use tools like MySQL Workbench to analyze the database’s structure and integrity.
Use MySQL Check Table Command: MySQL provides a built-in command called CHECK TABLE that allows you to check the integrity of tables in your database and repair any corruption or damage. You can use this command to check individual tables or the entire database.
CHECK TABLE table_name;
Use MySQL Repair Table Command: If the CHECK TABLE command identifies any issues with your tables, you can use the REPAIR TABLE command to fix them. This command repairs corrupted tables by rebuilding the table’s indexes and data structure.
REPAIR TABLE table_name;
Use MySQL Repair Database Command: If you suspect that your entire database is corrupted, you can use the REPAIR DATABASE command to repair all tables in the database at once.
REPAIR DATABASE database_name;
Use MySQL Table Maintenance Operations: MySQL provides additional table maintenance operations, such as OPTIMIZE TABLE and ANALYZE TABLE, which can help improve the performance and integrity of your database. You can use these commands periodically to optimize and maintain your database.
OPTIMIZE TABLE table_name;
ANALYZE TABLE table_name;
Monitor Repair Progress and Errors: During the repair process, monitor the progress and check for any errors or warnings that may occur. This will help you ensure that the repair is successful and that no further issues arise.
Verify Database Integrity: After repairing your database, verify its integrity by running diagnostic queries and checking for any remaining issues. Ensure that your data is intact and that the database functions properly.
Regular Maintenance and Monitoring: To prevent future database issues, implement regular maintenance tasks such as backups, monitoring, and optimization. Regularly check for errors, monitor database performance, and address any issues promptly to keep your MySQL database healthy and reliable.
By following these steps and best practices, you can repair your MySQL database and ensure that it remains stable, reliable, and free from corruption or damage.
cPanel and Plesk are two popular web hosting control panels that provide a graphical interface for managing various aspects of web hosting environments. They both offer tools and features to simplify the management of websites, domains, email, databases, and more.
However, there are some differences between cPanel and Plesk:
The User Interface
cPanel:
Traditionally known for its user-friendly and visually appealing interface.
Features an organized layout with icons for different functions.
Icons are grouped into categories for easy navigation.
Plesk:
Also user-friendly but with a different look and feel compared to cPanel.
Uses a card-based interface for easier navigation.
The interface may appeal more to users who prefer a different aesthetic.
The Operating System Support
cPanel:
Primarily designed for Linux-based hosting environments.
Has a Windows version called cPanel & WHM for Windows, but it’s less common.
Plesk:
Supports both Linux and Windows hosting environments.
Offers a unified interface for managing both Linux and Windows servers.
Integration & Compatibility
cPanel:
May have better integration with certain Linux-based hosting environments.
Often seen as a standard for shared hosting on Linux servers.
Plesk:
Known for its ability to seamlessly integrate with both Linux and Windows servers.
Suitable for those who need flexibility in choosing their server OS.
Updates & Licensing
cPanel:
Requires a license fee, and the pricing is often based on the number of cPanel accounts.
Regularly updated with new features and security patches.
Plesk:
Also requires a license fee, and pricing may be based on the number of domains or subscriptions.
Regularly updated with new features and security patches.
Ecosystem & Extensions
cPanel:
Has a rich ecosystem of third-party plugins and extensions.
Many web hosting providers offer cPanel as part of their hosting packages.
Plesk:
Offers a variety of extensions and integrations for added functionality.
Known for its flexibility and ability to support various hosting scenarios.
Security Features
cPanel:
Provides security features like SSL/TLS management and password-protected directories.
Users can configure security settings easily through the control panel.
Plesk:
Offers security features such as antivirus and anti-spam tools.
Has a security advisor tool to help users improve the security of their websites.
Databases
cPanel:
Supports popular databases like MySQL.
Provides tools for managing and configuring databases.
Plesk:
Supports a variety of databases including MySQL, PostgreSQL, and Microsoft SQL Server.
Offers a unified database management interface.
Email Management
cPanel:
Allows users to create and manage email accounts easily.
Supports popular email protocols and features.
Plesk:
Offers robust email management capabilities with features like spam protection.
Supports various email protocols and integrates with third-party email services.
Both cPanel and Plesk are reputable control panels with their strengths. The choice between them often depends on personal preference, hosting environment requirements, and the specific features you need for your website or application. Sangkrit.net offers you a choice between cPanel and Plesk, allowing you to select the one that best fits your needs.
cPanel has historically been more popular than Plesk, especially in the shared hosting market. cPanel has been widely adopted by many hosting providers and is often considered the standard control panel for managing Linux-based hosting environments. Its user-friendly interface and robust feature set have contributed to its popularity. If you are unable to make up your mind in selecting the one platform between the two then go for cPanel.
cPanel equips you with an easy interface to manage your domains and websites. The cPanel account at Sangkrit.net gives you access to several free applications to let you easily make different types of websites in a very short interval of time and that too without any technical skills.
But do you know you can also create separate cPanel hosting accounts on your Sangkrit.net VPS or Dedicated Server by using the WHM interface? Each cPanel account can have its primary domain and each can be given the privilege to host multiple domains. You can also set resource limits over new cPanel accounts. This includes disk space, bandwidth, email accounts, and more. You can either use the package defaults or customize these limits as per your requirements.
To create a new cPanel account you will need to set the following things:
Domain: The domain name for the new cPanel account.
Username: A username for the new account.
Password: A strong password for the new account or you may also use the password generator.
Email: An email address associated with the account.
Package: The hosting package or resource allocation for the account. If needed, you can create custom packages in WHM.
Settings: You may also configure any additional settings such as selecting a theme, enabling or disabling DNS clustering, and more.
Then simply follow these steps to create a new cPanel account:
Click Account Functions or use the search box to find it
Click Create a New Account
Fill up the mandatory fields and click Create
Now the Web Host Manager will display you a results page outlining your new Account. Next, you will see Account Creation Complete!!! at the bottom of the screen. Simply repeat the steps to create more cPanel accounts.
The accounts you create are accessible from the Servers tab on your Sangkrit.net products page. Go back to step no. 1, and you will see all your cPanel accounts are listed there. The new account holders would be able to log in to cPanel with the provided username and password to manage their website, email, and other hosting-related services.
Allocating and managing resources means creating hosting packages containing a set resource usage allowance for domains and websites you want to host on your dedicated server or VPS. You can set the maximum amount of resources that a domain can use so that other websites won’t get affected by it.
If you are running only one website then you may simply allot all server resources to it
If you are running multiple websites then you may either set a resource quota for each website or let all your websites freely use server resources
This lesson will guide you in creating new hosting packages, allocating resources, and assigning them to your domains.
Next to the account, you want to use, click Launch
From the management interface, next to the cPanel Site,
Click Manage Server (WHM)
Click Proceed
On your server’s home, add a new package:
Find the Packages section on the left sidebar,
Click Add a Package
Define regulations such as:
Disk space
Max domains
Max bandwidth usage
Max database usage
Max email, etc
As required by you, each or selective option can be left to unlimited. Now, click the blue color Add button at the bottom of the screen. That’s it, your package has been successfully created.
This way you can create as many packages as you want, and each package will work as a separate cPanel hosting account. You can edit or delete any packages by revisiting the packages page from the left sidebar of your dedicated server‘s home. The same steps also work for virtual private servers.
After you have subscribed to a dedicated server, the first thing you need to do is set it up for your main domain. Afterward, you can add multiple domains to your server or create other cPanel hosting accounts on your server to add domains.
For Hosting Multiple Domains From Server’s Admin Panel
This option lets you create different cPanel accounts for each of your domain names.
While creating any new cPanel account you can allow it to host multiple domains or simply keep it limited to only one domain. You can do this at your discretion by following these steps:
Use the left-side search box to find the List Accounts page
Click List Accounts
Click Create a New Account button
It will present you with a form where you can type in your domain name and select options for the new cPanel account you are creating.
Finally, click the ‘Create’ button.
Follow the same steps for creating separate accounts for your domains.
For Hosting Multiple Domains On A cPanelAccount
You can allow any cPanel account on your dedicated server to host multiple domains. This thing is done while creating new cPanel accounts (as we have done above) or you can edit any old account.
To edit any old cPanel account simply visit the ‘List Accounts’ page (as shown in step no. 6 above).
Next to the cPanel account, which you want to use, click Launch
Next, on the cPanel home page:
Scroll down to the Domains section
Click ‘Addon Domains‘
Type in the domain name
Click the ‘Add Domain‘ button
Each domain added by you will have its directory where you can upload your website or install WordPress. The web directory of your domains can be accessed from your cPanel’s home page -> File Manager option, present in the Files section.
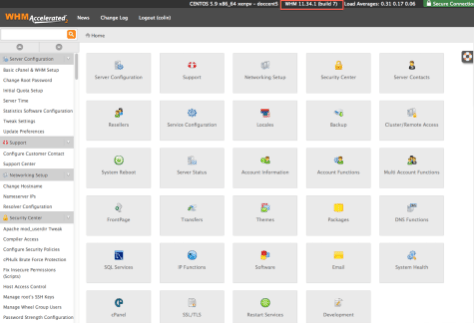
Linux VPS or Dedicated Server provides you with WHM to manage your website hosting accounts. WHM allows you to host multiple websites on different domains but that’s what cPanel may also do. So what is the difference?
The difference is that WHM allows you to set up separate cPanel accounts for websites and not only this but you can assign a package to limit the resource usage of websites hosted on your server.
Now if you only have one single website to host on your server and you want to use all your resources on that specific website then you simply set cPanel without assigning any package to it.
WHM stands for Web Host Manager. It is the main control panel for setting up a server and not the websites on the server, but the server itself. Setting up a website is the second step which you do after creating new cPanel accounts from the WHM of your server.
The Differences Between WHM & cPanel
WebHost Manager, or WHM, provides administrative control of your dedicated or Virtual Private Server (VPS). You use WebHost Manager to create individual accounts, add domains to your server, manage hosting features, and perform basic system and control panel maintenance
The main features of WHM are:
Server-Level Control Panel: WHM is designed for hosting providers and server administrators. It’s used to manage the server as a whole and to create and manage cPanel accounts for individual hosting clients.
Server Management: WHM focuses on server-level tasks, such as server configuration, software installation, security settings, and resource allocation to individual cPanel accounts.
Reseller Hosting: WHM allows for the creation of reseller hosting accounts. Resellers can use cPanel to create and manage their own hosting clients and accounts.
Security: WHM offers server-level security settings and access controls for managing cPanel accounts, including the ability to enforce security policies for all hosted accounts.
Resource Allocation: WHM lets administrators allocate resources like disk space, bandwidth, and other server resources to cPanel accounts.
User Authentication: WHM is accessed by administrators using their own login credentials. It’s used to create and manage cPanel accounts, each with its own set of credentials.
Typical Users: WHM is used by hosting providers, data center operators, and server administrators who manage multiple hosting clients or accounts.
The cPanel is designed for managing particular domains or hosting accounts on your server. End users can control everything from adding/removing email accounts to administering MySQL databases etc.
The main features of cPanel are:
End-User Control Panel: cPanel is designed for end-users, typically website owners, and administrators who manage their hosting accounts. It provides an easy-to-use graphical interface for various website and account management tasks.
Website Management: cPanel is primarily used to manage individual websites and their associated settings, such as creating and managing email accounts, databases, file management, and domain settings.
User-Level Features: cPanel offers features like website backups, email management, website statistics, domain management, and one-click application installations (e.g., WordPress).
Security: While cPanel provides security features, it focuses on the security of individual hosting accounts and websites.
Resource Usage: cPanel allows users to monitor and manage their resource usage, including bandwidth and storage.
User Authentication: Users log in to cPanel with their credentials.
Typical Users: cPanel is used by website owners, bloggers, small business owners, and anyone with a web hosting account.
cPanel is the end-user control panel used by individuals and businesses to manage their website and hosting account, while WHM is the server-level control panel used by hosting providers and server administrators to manage server resources, create and manage hosting accounts, and enforce security and resource allocation policies for multiple cPanel users. The two often work in tandem, with WHM allowing administrators to create and manage cPanel accounts for their clients.
If you are a web developer looking forward to setting up your own reseller hosting then this lesson will guide you step-by-step in creating your own reseller account on a Dedicated Server or VPS of Sangkrit.net.
What is a Reseller Account?
A reseller account is a special account created from WHM of a Dedicated Server or VPS. It is a cPanel account with more privileges.
The system allows reseller accounts access to a limited version of the WHM interface, which allows them to manage the cPanel accounts that they sell.
A reseller can allocate system resources on individual cPanel hosting accounts and then sell them to his clients.
To start up with a reseller account, you must own a Dedicated Server or VPS. Read our lesson on configuring a server at Sangkrit.net to start with WHM and cPanel.
How To Manage Reseller Accounts?
You can manage reseller accounts using one of the following WHM user interfaces:
The Resellers section (Home -> Resellers) provides you access to all of the reseller features.
The Reseller Center interface (Home -> Resellers -> Reseller Center) allows you to add or remove reseller privileges and provides links to all of the other reseller features.
By default, the system grants a set of limited privileges to reseller accounts. But you can add more privileges to any reseller account using the Edit Reseller Nameservers and Privileges interface present in Home -> Resellers -> Edit Reseller Nameservers and Privileges section.
However, you can directly mask an IP address to different records of your domain name to make it functional. But doing a nameserver setup lets you enlist all domain records in your nameservers to use them on your domain (website & email, etc).
Click Launch (Next to the account, you want to use)
Click Manage Server (WHM)
Click Proceed
Once, you are logged in to your server, follow these steps:
Navigate to WHM’s Nameserver Selection interface via WHM -> Home -> Service Configuration -> Nameserver Selection
Select the desired nameserver software
Click Save
To configure your default nameservers:
Navigate to WHM’s Basic WebHost Manager Setup interface via WHM -> Home -> Server Configuration -> Basic WebHost Manager Setup
Enter the desired nameserver names in the text boxes
Click Save
Remember, the name must prefix, a dot (.), and your domain. For instance: ns1.example.com and ns2.example.com.
Next, you will need to add the IP address to your nameservers:
Navigate to WHM’s Add a New IP Address interface via WHM -> Home -> IP Functions -> Add a New IP Address
Here you may either enter the main IP address or the IP address range (if you have one) in the New IP or IP range to add a text box
Enter the subnet mask in the Select a subnet mask for the IP or IPs above to use the text box
Enter any IP addresses that you wish to exclude in the IPs and IP ranges to exclude from the range of new IPs text box
Click Submit
Creating A or AAAA entries on your nameservers:
Access WHM’s Basic WebHost Manager Setup interface via WHM -> Home -> Server Configuration -> Basic WebHost Manager Setup
In the Nameservers text box, click Configure Address Records
Update the IP addresses in the appropriate text boxes
Click Configure Address Records
Click Close
Repeat the same steps for each of your nameservers.
For creating entries of your hostname:
Again, move to WHM’s Add an A Entry for Your Hostname interface via WHM -> Home -> DNS Functions -> Add an A Entry for Your Hostname
Enter your server’s IP address in the text box
Click Add Entry
Next, you will need to register the same nameservers on your Sangkrit.net account from your domain management section. You will need to change the nameservers of your domain to use these new domain nameservers.
Simply log in to your Sangkrit.net account and follow these steps:
Visit your products page, in the Domains heading, click Manage
Locate the domain for which you wish to set up your nameservers
Click the settings icon and select Manage DNS.
Click the Settings tab and click Manage under the Host Names setting
Click Add Hostname and enter the primary nameserver’s name (for example, ns1)
Enter the primary nameserver’s IP address in the IP Address text box and click Add.
Now, repeat the same steps for your secondary nameserver, this time use another nameserver such as ns2
Click Save. Then, click Edit Nameservers and select Custom option
Enter the full names of your two nameservers. (For instance: ns1.example.com and ns2.example.com)
Click OK and then Save your changes
That’s it. The DNS propagation takes some time to spread the domain’s new DNS records across the internet. So, allow it twenty-four hours and your settings will start to work.
There are a number of hosting options available for you to select as per your budget from Sangkrit.net. Each type of hosting has its own benefits and limitations but a dedicated server is built to deliver optimal performance to your business, and you are free to reconfigure it in the way you want.
Leasing Dedicated Servers For Yourself And Your Clients
A dedicated server is like having your own house where you can set up everything in the way you want. You can lease a server and configure it to your or your client’s web applications such as WordPress, eCommerce, Gaming, Video Streaming, or anything else. There are self-managed, managed, and fully managed servers.
On managed servers, you get WHM i.e. web host manager and cPanel for easily managing your client’s websites and applications. Whereas on a fully managed server, you also get a professional team to help you out with complicated tasks.
The Target Audience
As a Sangkrit outlet, you can offer a dedicated server to any of your clients but big enterprise-level businesses are more suitable targets for you. By suggesting a dedicated server you are offering them complete isolation i.e. no sharing of resources and full power over their hosting option.
Every Linux-based managed dedicated server offers you
Dedicated IP address
Single-tenant infrastructure
Command line as well as World Host Manager & custom cPanels
Higher levels of security
DDoS protection
Backup options
Servers GiveOptimal Performace To Your Websites & Apps
A dedicated server is built to provide you with optimal performance. You get the advantage of full processing power with metal servers from a tenant having root privileges for establishing complete command on the server, reaching up to the kernel. You can change the configuration of the server, and install-uninstall software because you have all exclusive access to it.
How To Lease Dedicated Server?
Simply visit the dedicated server’s page at Sangkrit.net, select your server, and click the ‘Configure Your Server’ button. Here you will be asked to select your options such as operating system, control panel, and support team.
Once you do that, simply click the ‘Checkout’ button and make the payment. That’s it, you will now see the server listed on the products page of your Sangkrit.net account.
cPanel provides you with powerful website backup and restore options with which you can back up your complete website, get backup notifications, and then easily restore your website whenever needed. There are two backup options in cPanel: Full Backup and Partial Backup.
Full backup creates an archive of all website files and configurations set on your website. This can be used for moving your account from hosting to a dedicated server or VPS or to keep a local copy of your website files.
Full backups cannot be restored through your cPanel interface. Hence, to restore full backups you have to manually upload files and import the MySQL database.
cPanel of Sangkrit.net provides you with all video tutorials and you can easily view them right from the home screen of your cPanel.
Partial backup is another feature that allows you to back up your website but here you can select what you want to backup. You can separately backup and download your Home Directory, MySQL Databases, Email Forwarders, and filters.
Backups can be downloaded or restored from the ‘Backups’ page, you can access it from the Files section of your cPanel. It allows you to download backups to your computer as a zipped copy of either your entire site including your home directory, databases, email forwarders configuration, and email filters configuration, or one of the previously mentioned parts of your site.
Enter the username & password and log in to your cPanel.
Click ‘Backup Wizard’ from the ‘Files’ section.
It presents you with backup and restore options. (The restore option allows you to restore your website files or database from earlier generated backup files.).
Again it presents you with two options: Full Backup and partial site backups.
Full backups create an archive file containing files and configurations of your website. Whereas partial backup allows you to separately create and download backups of website files, databases email forwarder filters, etc. The good thing about partial backups is that cPanel provides a quick direct feature for restoring partial backups.
Select a backup option, wait for some time and it will provide you download links for your backup files.
If you have selected full backup then you may also enable email notification (on the full backup screen) and the system will send you an email upon completion of your website backup.
It’s not necessary to download backup files at the same time. All backups are saved in your server and can be accessed from the backups page of your cPanel’s ‘Files’ section.
You can manage/download backups anytime by visiting cPanel and clicking the ‘Backups’ icon. It provides you with options for downloading saved backups. Also, you can generate or restore backups from there itself.
How To Restore a Backup?
As we have already said cPanel provides you the built-in option for restoring backup files (generated manually or via cPanel’s Partial Backup option) for the home directory, MySQL databases, and Email Forwarders and filters.
From your cPanel home, Click ‘Backup Wizard’ under the ‘Files’ section
Select the restore option, it allows you to restore your website files or database from earlier generated partial backup files.
You can select what to restore like your Home Directory, MySQL Databases, Email Forwarders, and filters.
For Example: Suppose you want to restore your MySQL database from its downloaded backup file on your computer’s hard disk.
Simply click ‘MySQL Databases’ and use the ‘Browse’ and ‘Upload’ buttons to restore the backup back to your server.
The manual transfer requires you to download files as well as the database and then upload them to your new server. But there is another method on dedicated servers that allows you to copy your account directly from your previous cPanel host.
What You Will Need?
To start you will need your server address (IP or FQDN) which you can either find yourself or get from your service provider. Second, you are going to need the username and password of your cPanel account.
Click Launch (Next to the account, you want to use)
Click Manage Server (WHM) (visible next to cPanel Site)
Click Proceed
On your WHM panel use the left side navigation search box to find the page ‘Copy an Account From Another Server With an Account Password’. On this page, you will see fields for the Server to copy from, username, and password.
On the ‘Server to Copy’ field enter the IP address of your remote server. Next, fill in the username and password then press the ‘Copy Account’ button.
In case you have an additional IP address assigned to your server. You can also select the ‘Give new account an IP address’ option to get the available IP address automatically assigned to your new account.
How Does It Work?
The server will try to connect to the remote cPanel server and copy the specified account.
It is going to check the remote server every minute till the backup is completed. So at the time the copy process goes do not close your web-browser tab.
How Much Time Does It Take?
The time it takes depends on the size of your account on the remote server and once the account is successfully copied you will see the account restored message.
How To See Your Newly Transferred & Restored Account?
Once you see the account restored message at the bottom of the page. Use the top-left search box to type ‘list’, then click on the ‘List Accounts’ option. You should now see the copied account on your server.
How To Make It Work?
Once you have made sure that your old account has been copied to your new server at SANGKRIT.net. You will need to update your domain’s name servers to make your domain point to this new location.
In case you need any kind of assistance in transferring your website, simply contact the support of SANGKRIT.net via the Support Page or Helpline numbers.
The Configuration Cluster is a server interface that enables you to link the master server to other additional servers. In the context of cPanel and WHM hosting, a “Configuration Cluster” or “Server Configuration Cluster” typically works as a feature that allows multiple cPanel & WHM servers to work together as part of a cluster.
It provides redundancy, which helps ensure that if one server in the cluster fails, another can take over, minimizing service disruption. Clustering can be used for load-balancing web traffic. It distributes incoming web requests across multiple servers, preventing any single server from becoming overwhelmed with traffic.
This clustering is often used to distribute the load, improve redundancy, and enhance the scalability of a hosting infrastructure. cPanel provides a feature known as “Server Clusters” to facilitate this.
On your VPS or Dedicated Server, you can easily add more servers to the configuration cluster by following these steps:
Visit WHM’s DNS Cluster interface via WHM -> Home -> Clusters -> DNS Cluster
Click to Enable DNS Clustering
Click the Change button
Click Return to Cluster Status
Select the server to add to the DNS cluster
Add a new server to the cluster menu
Click Configure
In the Remote cPanel & WHM DNS host text box of the cPanel DNS Remote Configuration interface
Enter the hostname or IP address of the nameserver to add to the cluster
Enter the WHM username for the nameserver
Enter the nameserver’s API token hash or remote access key in the Remote server access hash text box
To automatically configure the DNS cluster on the remote server – Select Setup Reverse Trust Relationship
To synchronize the new server with other nameservers simply select Synchronize Zones Immediately option
To specify the server’s DNS role, select a setting from the DNS Role menu
Click the Submit button
For deleting a server from the DNS cluster:
Visit the DNS Cluster interface via WHM -> Home -> Clusters -> DNS Cluster
In the Modify Cluster Status text box, select Disable DNS Clustering
Click Change, then Click Return to Cluster Status
Log in to the servers that remain in the cluster
Navigate to the DNS Cluster interface via WHM -> Home -> Clusters -> DNS Cluster
Locate the server that you wish to delete
Click the x icon under the Actions heading
To make changes in your server in the DNS cluster:
Locate the server that you wish to edit
For DNS changes – In the DNS Role menu, select a new role for the server
Click the save icon to save your changes
Next, to edit a server’s configuration settings
Click the edit icon under the Actions heading
The cPanel DNS Remote Configuration interface will appear
Make your changes to the server’s settings
Click the Submit button
Remember that the API tokens can be generated in the WHM’s Manage API Tokens interface. Simply navigate to WHM -> Home -> Development -> Manage API Tokens page.
If you own a Linux-based server at Sangkrit.net, you can simply copy the changes made to the master server to all other servers by navigating to WHM -> Home -> Server Configuration -> Update Preferences settings on the master server. This simply outs all changes to all servers on the cluster.
Another feature called DNS clustering allows multiple cPanel & WHM servers to synchronize their DNS zone data. When a change is made to a DNS record on one server, it is automatically replicated to the other servers in the cluster. This provides redundancy and load balancing for DNS requests.
cPanel & WHM allows you to set up specialized DNS-only servers that manage DNS records for your websites. These servers work in conjunction with your primary cPanel & WHM servers to handle DNS queries, improving performance and reliability.
The one-click website installer at Sangkrit.net makes it easy for you to build, enhance, and manage any kind of website on your own.
In previous lessons, you learned about installing new web apps on your domain to start any kind of website without any technical skills. Now, this lesson explains how you can upgrade installed applications to keep your website updated with new security releases, the latest features, and the current World Wide Web consortium.
Log in to your Sangkrit.net account, visit your products page, and follow these steps:
Next, to the hosting account you want to use, click Manage
Open the cPanel or control panel of the web hosting or server
In the Software section, click Installatron Applications Installer
Next, to the application you want to use, click (update)
Scroll down, and then click Update
In case you are using Windows hosting then visit the products page and next to the hosting account you want to use, click Manage.
Now Go to the Applications tab, click Manage My Applications, and in the Name column for the application, you want to use, click Update Available. Finally, scroll down and then click the Update Now button.
When a database user loses his access to configured databases, you may need to restore that user’s grants to the database using the restoregrants utility on WHM.
The first step you need to make is to access your command line and then use restore grants to restore the user’s database access:
$cpuser – is the cPanel username that has lost access to databases.
{mysql, pg} – is the type of database: mysql for MySQL or pg for PostgreSQL.
$dbuser – is a database user whose privileges you wish to restore. If you use –dbuser, the $dbuser variable will consist of the database user’s name. If you use –all, the script will restore grants for all of the database users that belong to the cPanel account.
How to update the user’s password to restore database access on cPanel?
In certain circumstances, the restoregrants script may fail to restore access to the database.
In such a case, either the cPanel or the WHM account owner can reset the cPanel account’s password in order to restore grants by following the given steps.
For restoring grants from cPanel:
Navigate to cPanel > Change Password.
Select Allow MySQL password change.
Change the password and click Change your password now.
Steps for server administrator i.e. the owner of the WHM account:
Navigate to WHM > List Accounts.
Click + next to the appropriate account.
Select Sync MySQL password with the account password.
Enter a new password into the Change Password box and click Change.
SSH key authentication is a secure method of logging into an SSH server without needing to enter a password. It relies on the use of a pair of cryptographic keys: a private key (kept secret) and a public key (shared with the server). This lesson guides you on how to set up SSH key authentication and login to the server without password.
Generate SSH Key Pair
First, you need to generate an SSH key pair if you don’t already have one. Open your terminal and run the following command to generate a new SSH key pair:bashCopy codessh-keygen -t rsa -b 2048 -f ~/.ssh/id_rsa
-t rsa: Specifies the type of key to create (RSA).-b 2048: Sets the key length to 2048 bits (you can use higher values for stronger security).
-f ~/.ssh/id_rsa: Specifies the file name for the generated key pair (the default location is ~/.ssh/id_rsa).
During key generation, you can choose to set a passphrase for added security, but it’s optional. A passphrase adds an extra layer of protection to your private key.
Copy the Public Key to the Server
Next, you need to copy your public key to the server you want to access via SSH. You can do this manually or by using the ssh-copy-id command.
Replace <username> and <hostname> with your server’s username and hostname:bashCopy codessh-copy-id <username>@<hostname>
If you prefer to do it manually, you can append the contents of your public key (~/.ssh/id_rsa.pub) to the ~/.ssh/authorized_keys file on the remote server:bashCopy codecat ~/.ssh/id_rsa.pub | ssh <username>@<hostname> 'mkdir -p ~/.ssh && cat >> ~/.ssh/authorized_keys'
Make sure the ~/.ssh directory on the remote server has proper permissions (usually 700), and the ~/.ssh/authorized_keys file should have permissions set to 600.
Test SSH Key Authentication
You can now test SSH key authentication by attempting to SSH into the remote server:bashCopy codessh <username>@<hostname> If you set a passphrase for your private key, you’ll be prompted to enter it. Otherwise, you should be logged in without being asked for a password.
Disabling Password Authentication
For enhanced security, it’s a good practice to disable password-based authentication once you’ve confirmed that SSH key authentication is working. You can do this by modifying the SSH server’s configuration (typically located in /etc/ssh/sshd_config).
Set PasswordAuthentication to no.Reload the SSH server: sudo service ssh reload or sudo systemctl reload ssh.This ensures that SSH access can only be obtained using the authorized SSH key.
SSH key authentication is a secure and convenient way to access remote servers, and it’s widely used for server administration and secure file transfers. Just remember to protect your private key and use passphrases for added security.
The lesson guides you on the Linux server environment. If you’re using Windows, you can use an SSH client like PuTTY or Windows Subsystem for Linux (WSL) to follow similar steps.
PHP version is displayed on your cPanel’s account home page. An unsupported PHP version is one reason why your website goes down, and displays a blank white page or error 500. This could happen when your website doesn’t support the PHP version active on your hosting account.
You may also check the documentation for the software you’re using such as WordPress, Joomla, Drupal, etc. to determine PHP compatibility requirements. Look for specific PHP versions or extensions that your software recommends or requires.
To fix PHP version compatibility issues on cPanel hosting, you need to ensure that your website’s PHP version is compatible with the scripts, themes, and plugins you are using. Once you are sure about the version your website requires, you can easily change the PHP version from your cPanel and make it compatible with your website or app.
How To Change PHP Version On cPanel?
Log in to your Sangkrit.net account and follow these steps:
Navigate to the ‘My Products’
Select the ‘Web Hosting’ option
Next to the cPanel account you want to use, click Manage.
Click cPanel Admin and then scroll to the Software section.
Click Select PHP Version, this displays your current PHP version which can be changed from the drop-down.
Click the “Set as current” or “Save” button to apply the selected PHP version.
You may have multiple PHP versions to choose from. If your software specifies a particular PHP version, choose that version. Otherwise, you can typically select the latest stable version.
If you encounter difficulties or errors that you cannot resolve yourself, simply reach out to the support team. They will assist you with all troubleshooting and configuration settings.
PHP-FPM (FastCGI Process Manager) is a PHP undertaking that provides an alternative way to run PHP scripts on web servers. The cPanel webhostingVPS, and Dedicated Servers at Sangkrit.net gives you the option to use PHP-FPM on your websites.
It is programmed to improve the performance and efficiency of PHP execution, particularly in the context of serving web applications. In the traditional way of executing PHP scripts, such as the web server like Apache uses a separate process to handle each PHP request which sometimes leads to high memory consumption and inefficiencies, especially while handling multiple concurrent requests. PHP-FPM addresses these issues by managing PHP processes more efficiently.
It offers several benefits over traditional PHP execution:
Performance: PHP-FPM is designed for better performance and resource utilization, making it particularly effective for high-traffic websites or applications.
Resource Efficiency: PHP-FPM pools can be configured to allocate resources more effectively, reducing memory usage and improving server responsiveness.
Process Management: PHP-FPM can manage PHP processes dynamically based on the number of incoming requests. It helps prevent server overload and ensures smooth operation during traffic spikes.
Isolation: PHP-FPM pools isolate each website’s PHP processes, providing better security and stability.
Customization: You can configure PHP-FPM settings, such as the number of child processes, to suit your website’s requirements.
How To Use PHP-FPM On cPanel?
The cPanel webhosting environment at Sangkrit.net gives you the option to enable and configure PHP-FPM for your websites. Here’s how you can do it:
Log in to cPanel: Access your cPanel account using your login credentials.
Find PHP Configuration: In the cPanel dashboard, look for the “MultiPHP Manager” or “Select PHP Version” option. This is where you can manage PHP settings for your domains.
Select PHP-FPM: In the PHP version manager, you’ll see a list of your domains and the currently used PHP version. You can select “PHP-FPM” from the dropdown menu for the domains you want to enable it for.
Configure PHP-FPM: Depending on the cPanel version and your hosting provider’s settings, you might have the option to configure PHP-FPM settings. This could include adjusting the number of child processes, the PHP-FPM version, and other options.
Save Changes: After enabling PHP-FPM and making any necessary configurations, save your changes.
Test: You can now test your website to ensure that PHP-FPM is working as expected. Observe the performance and resource usage.
Keep in mind that PHP-FPM configurations might vary based on the new updates, policies, and the cPanel version being used. So for any kind of online support or specific instructions on enabling and configuring PHP-FPM for your domains simply contact the support team.
Manually performing routine tasks can be time-consuming and prone to errors. This is where cron jobs come into play. A cron job is a scheduled task that allows you to automate various processes on your server. In this blog post, we’ll dive into the world of cron jobs and explore how you can harness their power within cPanel for a more streamlined and efficient website management experience.
Cron jobs are named after the “cron” daemon, a time-based job scheduler in Unix-like operating systems. They allow you to schedule tasks to run automatically at specified intervals, whether it’s daily, weekly, monthly, or even down to the minute.
Time Savings: Automating repetitive tasks frees up valuable time for more strategic endeavors.
Consistency: Automated tasks are performed consistently, reducing the risk of human errors.
Timely Updates: Cron jobs ensure that updates, backups, and maintenance tasks are executed on time.
Enhanced Performance: Scheduled tasks can optimize your website’s performance and efficiency.
Data Management: Cron jobs can help manage databases, clear temporary files, and perform routine maintenance.
Where You Can Use The Cron Jobs?
General tasks you can schedule with cron jobs:
Scheduled Backups: Automate the backup of your website files and databases regularly.
Content Updates: Schedule content updates, such as publishing new blog posts or articles.
Security Scans: Set up cron jobs to run security scans and checks for vulnerabilities.
Database Optimization: Automate database optimization to improve site performance.
Clearing Cache: Schedule cron jobs to clear cache and temporary files to maintain site speed.
Other tasks done with cron jobs can be:
Automated Tasks: Schedule regular backups of your website files and databases. You can clean up temporary files and cache to optimize website performance and also run security scans and checks for vulnerabilities.
Content Management: Schedule the publishing of new blog posts or content updates. You can automate content archiving or removal.
Database Maintenance: Optimize, repair, or back up databases. Schedule database backups to prevent data loss.
Server Maintenance: Perform routine server maintenance tasks such as log rotation and automate software updates and patches.
Email Campaigns: Schedule the sending of email campaigns to reach your audience effectively. You can also automate email list maintenance tasks.
Data Synchronization: Set up cron jobs to synchronize data between different systems or databases.
File Management: Automate tasks like moving, copying, or archiving files and directories. You can also schedule file cleanup to remove old or unnecessary files.
Renewals & Expirations: Automate the renewal of SSL certificates before they expire.
E-commerce Tasks: Automate inventory updates, product imports, and order processing.
Regular Reporting: Generate and send regular reports to stakeholders.
Server Monitoring: Run scripts that monitor server health and performance.
Social Media Automation: Automate the posting of social media updates at specific times.
Custom Scripts: Set up custom cron jobs to execute specific scripts or commands.
How To Create Cron Jobs On cPanel?
Creating cron jobs within cPanel is generally a five-step process. Simply log in to your Sangkrit.net account, visit the ‘My Products’ page, and open the cPanel of the hosting or server wherever you want to schedule a cron job. Next, follow the given steps:
Access your cPanel dashboard through your hosting provider.
Look for the “Cron Jobs” icon and click on it.
Select the frequency at which you want the cron job to run – whether it’s once a day, once a week, etc.
Enter the command that the cron job should execute. This can include shell commands, scripts, or URLs.
Use advanced settings to fine-tune your cron job, such as email notifications upon completion.
You should always test your cron job commands before setting them up in production. While specifying file paths, use absolute paths to ensure accuracy. Apart from this, periodically review and update your cron jobs to adapt to changes.
Cron jobs are like your personal virtual assistants, handling routine tasks in the background while you focus on more critical aspects of your website. With cPanel’s user-friendly interface, creating and managing cron jobs becomes a breeze. By automating tasks that would otherwise require manual attention, you can enhance your website’s performance, improve efficiency, and ensure that your online presence is running smoothly around the clock.
cPanel and Plesk are two prevalent web hosting control panels that enable users to manage various aspects of their web hosting environment using an easy graphical user interface.
Each control panel has its own features, advantages, and considerations. Bot panels are user-friendly, and offer automatic application installation, SSL, and TLS configurations but still, there are some differences that are very important to know if you planning to buy a new web hosting option.
The Cost Differences
There are no big cost differences between cPanel and Plesk. Each control panels come with licensing costs that are paid by the hosting provider. Some web hosts may charge an additional fee for cPanel and Plesk but at Sangkrit.net, there is nothing like that, and the cost of both hosting plans are nearly the same.
The Server Compatibility
You don’t have to worry about it if you are hosting your website at Sangkrit.net as all its web hosting plans come with a pre-installed version of cPanel and Plesk, all you have to do is select the hosting option that you are willing to purchase. Elsewhere it is important to choose a control panel that is compatible with your server’s operating system i.e. Linux or Windows. cPanel works on Linux whereas Plesk is compatible with both operating systems but it is mainly popular on Windows Operating System.
The Programming Language Compatibility
While Plesk can often handle popular frameworks built with various programming languages (such as Django for Python), less commonly used or newer frameworks might not have built-in support. It might not immediately support programming languages that are very new or still in experimental stages, as it takes time for new languages to gain widespread adoption and integration. Plesk Windows hosting is perfect for those who use ASP.NET, ASP, or SQL Server.
On the other side, cPanel is not for ASP.NET and .NET technologies. For such languages, you would typically need a Windows-based hosting environment, which is commonly managed using the Plesk control panel or other Windows-specific control panels.
The Application Compatibility
If you’re using a custom or proprietary application or an application that uses proprietary programming language such as ASP or .NET or any language that is not widely recognized or used, cPanel won’t be offering any support for that. cPanel is primarily designed for Linux-based hosting environments and is not natively geared toward supporting Windows-specific technologies like ASP.NET. For ASP and .NET like languages, Windows Plesk is the perfect option.
Please note that the hosting can upgrade over time, so it’s advisable to check with the hosting plans at Sangkrit.net for the most up-to-date information on available technologies and control panel options for your specific needs.
The choice between cPanel and Plesk depends on your specific needs, preferences, and familiarity with each platform. It’s important to note that what may be considered “better” can vary based on individual requirements but you should also know that most programmers especially those who are the masters of prevalent web technologies prefer cPanel over Plesk i.e. Linux over Windows hosting. So finally, cPanel wins, and the system at Sangkrit.net also recommends cPanel-based hosting and servers.
The lesson guides you on how you can easily start up your own auction website at any Sangkrit.net web hosting option.
Auction means a public sale event where items, goods, or services are offered for bidding, and then are sold to the highest bidder. Auction Websites operate similarly to traditional auctions, but the bidding and transactions are conducted online rather than in a physical location.
These websites are programmed to provide an online platform where individuals or businesses can list items for sale and enable buyers to bid on those items. Auction websites provide an online platform for a wide range of items to be sold, including collectibles, antiques, electronics, fashion items, art, and more. They offer convenience for both buyers and sellers by enabling online transactions without the requirement for physical presence. Some popular examples of auction websites may include eBay, LiveAuctioneers, and PropertyRoom.
You will be making Auction Website by installing the WeBid app via Installatron, the website automation system that lets you start any kind of website in minutes. But the first thing is to know about the WebBid app.
What Is WeBid App?
WeBid is a free and open-source web application that allows anyone to create and manage online auction websites. It provides a platform for individuals and businesses to set up their own auction sites, where users can simply bid on and win items listed by sellers.
The application easily installs on any hosting plan and is programmed to be user-friendly and customizable. Thus making it suitable for both beginners and masters.
Key features and characteristics of the WeBid web application include:
OnlineAuction Management: WeBid allows users to list items for auction and set various parameters such as starting bids, reserve prices, auction durations, and bidding increments.
OnlineBidding System: Users can place bids on items listed in auctions. The highest bidder at the end of the auction wins the item.
User Registration and Profiles: WeBid supports user registration, allowing bidders and sellers to create accounts and manage their profiles. Registered users can track their bidding history, won items, and more.
Categories & Listings: Sellers can categorize their items to make them easier to find for potential buyers. The application supports various listing formats, including fixed-price listings and traditional auction-style listings.
HighlyCustomizable: WeBid provides customization options through templates and themes. Users can choose from different templates or create their own to match the look and feel of their auction website.
Payment Gateways: The application supports integration with payment gateways, enabling secure online payments for items won in auctions.
Messaging System: WeBid includes a messaging system that allows communication between buyers and sellers. This can be particularly useful for questions about items or payment.
Protection &Security Features: WeBid offers security features to protect user data and transactions. It includes CAPTCHA for spam prevention and encryption for secure communications.
Multi-Language Support: WeBid supports multiple languages, making it suitable for creating auction websites that cater to a global audience.
Administration Panel: The application includes an administration panel that allows site administrators to manage users, listings, categories, and other aspects of the auction site.
Search and Filtering: WeBid provides search and filtering options to help users find specific items they are interested in bidding on.
Community and Online Support: WeBid has a community of users and developers who contribute to its development and offer support. Users can access documentation, forums, and resources for assistance. Apart from that Sangkrit.net users can access round-the-clock privileged customer support from their account section.
It is particularly well-suited for individuals and businesses willing to create their own online auction platforms. It offers all the necessary tools to help you set up and manage your or anyone’s auction website with ease, whether for general merchandise, collectibles, unique items, or other categories. Users having no technical skills can also install and configure the WeBid app and get their auction sites up and running.
Now visit the ‘My Products’ page from the top right corner menu of your Sangkrit.net account and click ‘Setup’ next to the hosting option you like to use. This will start an online step-by-step process of connecting your domain name and configuring your hosting option so that you can use it.
Once, the hosting is set up, simply click ‘Manage’ and access the control panel of your web hosting. This is typically cPanel, Plesk, or a similar interface to which you have subscribed.
Look up ‘Installatron’, click to open it, and it will take you to the Application Browser page. Now simply follow these steps:
Find WeBid On Applications Browser: Inside Installatron, you’ll see a list of available applications you can install. Search for “WeBid” in the search bar or locate it in the “E-commerce” or “Auctions” category.
Start the Installation: Once you’ve found WeBid, click on it to start the installation process.
Configure the Installation: You will be presented with installation options and configuration settings. Follow these general steps:
Choose Domain: Select the domain where you want to install WeBid.
Directory: Decide if you want WeBid to be installed in the root directory (e.g., http://yourdomain.com) or in a subdirectory (e.g., http://yourdomain.com/auction).
Admin Username and Password: Set the admin username and password for accessing the WeBid admin panel.
Site Name: Enter the name of your auction website.
Database Settings: Choose whether to create a new database or use an existing one. Provide a name for the database and set a username and password.
Language: Select the preferred language for your WeBid installation.
Advanced Options (Optional): Depending on your requirements, you may have additional options to configure, such as backup settings, cron jobs, and more. You can leave these at their default settings if you’re unsure.
Start The Installation Process: Click the “Install” button to initiate the installation process. Installatron will now install WeBid on your chosen domain. This process might take a minute or two.
Installation Completes: After the successful completion of the installation process, you will see a confirmation message.
Website Details: It will also give you details about accessing your newly installed WeBid website and its admin panel.
Access Your WeBid Site: Use the provided URLs and credentials to access your new auction website and the admin panel.
Congratulations! You’ve successfully installed WeBid using Installatron on your Sangkrit.net hosting option.
Now you can start customizing and setting up your auction website, adding items, and configuring the platform according to your preferences.
Alternative Method – WordPress Auctions
If you are a WordPress user and you think using WordPress for making your online auction website would be easier than using any new application then you can do it with WordPress. The “Ultimate WordPress Auction Plugin” is a powerful tool that can easily add auction functionality to your WordPress Website.
Login to the admin panel of your WordPress site and navigate to Plugins -> Add New page to search and install the “Ultimate WordPress Auction Plugin” plugin on your website.
After activation, you will find its new menu item added to your admin area dashboard. Click on it and configure the general settings, such as currency, time zone, and auction listing layout.
For creating a new auction, navigate to the auction plugin section and click on “Add New Auction” and fill in the important details such as:
Title & Description
Images of the item
Starting bid price
Bid Increments
Auction start and end dates
Auction type such as standard or reverse, etc
You would be able to view and manage all your auctions from the plugin’s dashboard as well as monitor bids and bidder information for each auction. The plugin enables you to extend or close auctions manually if required.
How Does WordPress Auctions Plugin Works?
The bidders can place bids on the items listed in auctions. The condition is that their bids should be higher than the current bid thus meeting the bid increment rules.
Aste Boetto, A Real Auction Website Created With This Plugin
As soon as the auction ends, the highest bidder wins. The admin person can communicate with the winning bidder through email and on the basis of setup, can arrange the payment and delivery.
Another important thing to keep in mind is that the users must be registered and logged in to participate in auctions. You may open the registration on your website by visiting your admin area dashboard Settings -> General page and selecting the option ‘Anyone can register’ or you may selectively invite the users for registration by visiting Users -> Add New page that enables you to add new users and invite users through email.
The specifics of using the “Ultimate WordPress Auction Plugin” might vary based on the plugin’s features, your theme, and your website’s setup. So always refer to the plugin’s documentation for more specific instructions. For a prompt response during any issues, you may also contact us using the following comment form.