WordPress media library allows you to upload and insert images from your computer’s hard drive. Or from your media library, the images which you have saved in media library thru ‘Add Media’ button. But by default it doesn’t allows you to use or access any images uploaded manually to your server’s hosting directory.
In this tutorial we will show you how you can easily insert those images inside your content (posts, pages and post types) which you have uploaded manually to your server.
WordPress built-in feature for uploading and inserting images is excellent but unfortunately there are many web hosts that provides you limited PHP memory and server space.
Some offers you hosting at a very low prices but add a lot of limitations like they takes away your ability to upload large files through web browser.
Add From Server is a very good WordPress plugin that lets you import files from your webserver to WordPress. You can either individually or in bulk import image files which you have uploaded to your servcer via FTP or File Manager etc.
How To Use Add From Server Plugin?
Install and activate Add From Server plugin then visit your admin area dashboard and create a new post (page or post type).
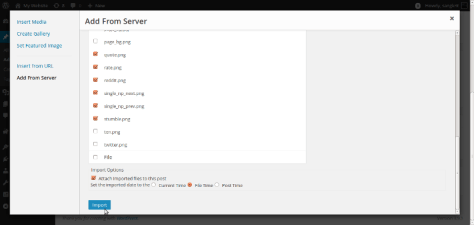
Now click ‘Add Media’ button and select ‘Add From Server’ tab. You will be seeing your site’s root directory, the sub-directory, files and a quick jump navigation link for (WordPress Root, Uploads Folder and Content Folder).

You can easily navigate by clicking directories with your mouse pointer. For importing images, simply tick them and click ‘Import’ button.
The plugin also provides you a set of options you can access from your admin area dashboard Settings -> Add From Server screen:

- You can give all user the ability to to upload files (default)
- Or you can set selected user roles with to upload files
- Or you can manually list users (by typing their usernames) with the ability to upload files
- The plugin also provides you option to lock browsing to a specific directory.


